Views
# Views
Usually, when you open an entity (subarea of particular entity), you'll see the list view, which shows a list of records belonging to that entity, formatted as a table.
For example, if you open the All subarea in Organizations group that belongs to Account entity, you'll see a list of individual accounts.
# View layout
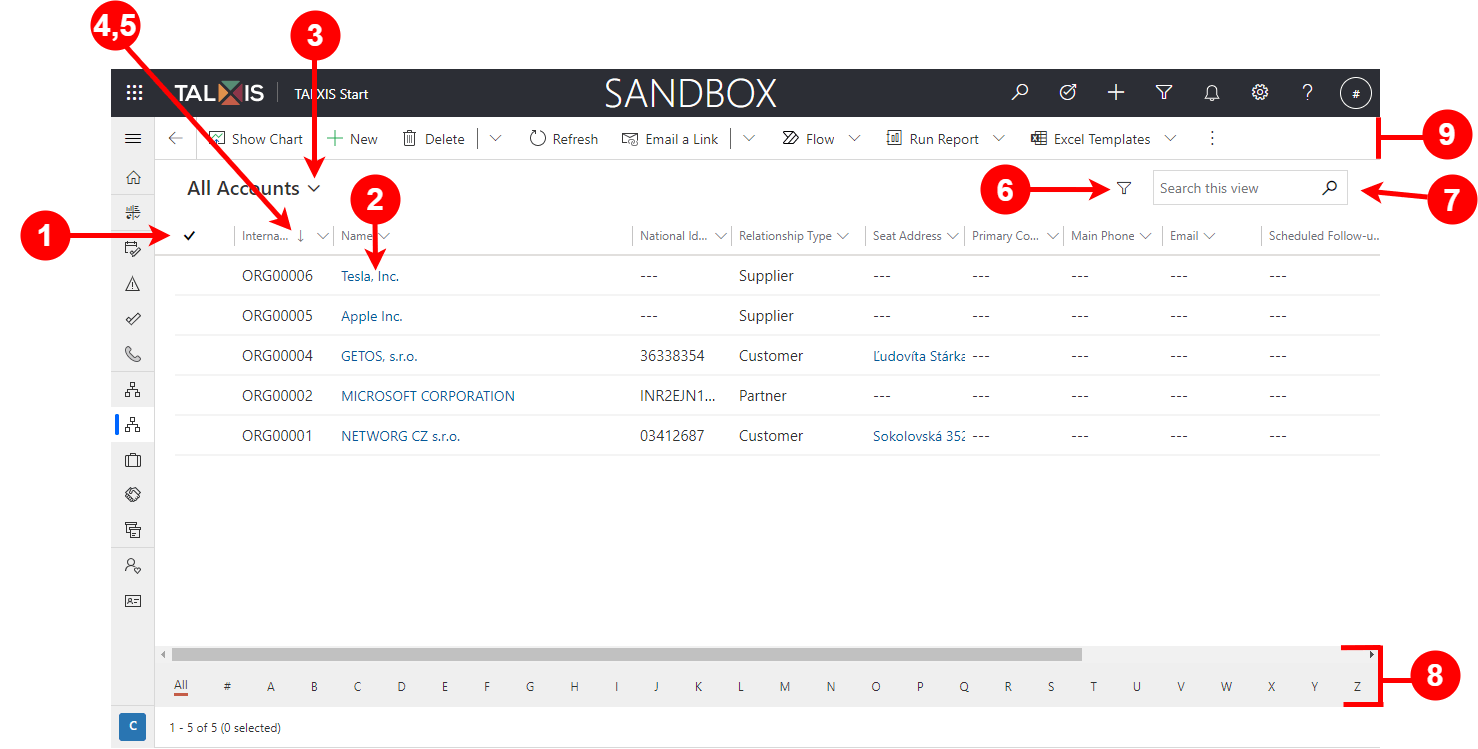
Legend:
- Select records
- Open a record
- Choose a system view
- Sort the list
- Filter the list
- Advanced filter
- Search the list
- Paging and filtering
- Command bar
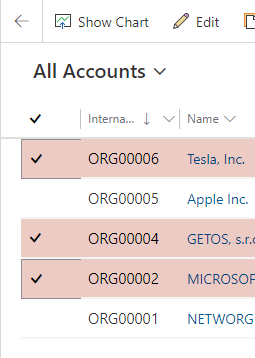
1) Select records
Select one or more records by placing a check in this column. Depending on where you are working, you may be able to apply a single operation to all the selected records at once using buttons in the command bar.
2) Open a record
Select any record in the list to open its record view, which shows all the details about the record. Usually you should select from the Name column to open a record from the current entity. Some entities provide links to records from related entities in other columns (such as a related contact).
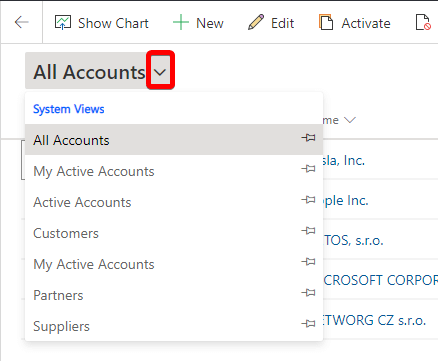
3) Choose a system view
A system view is predefined to show commonly used list views such as active contacts, tasks assigned to you, closed leads, and so on. The current system view is shown as a heading above the list. To change the system view, select the down arrow next to this heading and choose the view you want. To set a view as the default, select the pushpin icon next to the view in the open menu.
4) Sort the list
Select a column heading to sort the list by values in that column. Select the heading again to sort in the opposite direction. An arrow in the column heading indicates which column is being sorted and in which direction.
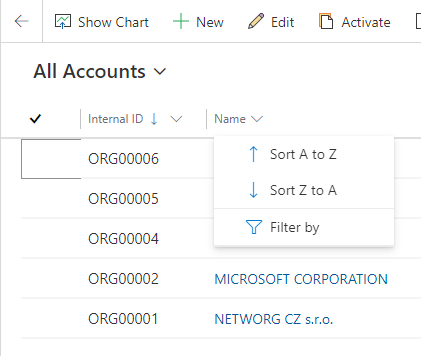
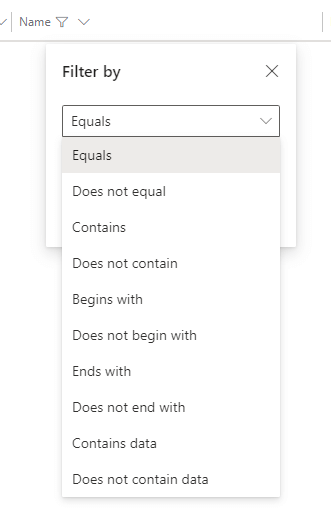
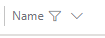
5) Filter the list
Select a column heading to filter the list by values in that column. The funnel icon shows to indicate which column is being filtered. You can filter list values by specific condition as you can see on picture below.
Filter conditions
Funnel icon after using filter
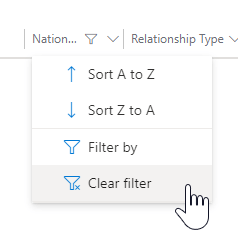
Clear filter
6) Advanced filter
All filters used within a given view can be displayed using the advanced filter button. Clicking the button opens a panel with the current filters, which you can freely modify, delete or add new filters.
In the advanced filter you can create groups of conditions, so if we have a lot of records we can enter specific parameters for the record that we are trying to find in the table of records.
Example: We want to find all records that have the word "invest" in the title and are active at the same time. We want these accounts to be from Prague or Brno.
Solution:

7) Search the list
Enter text in the search field above the list to show only those records that contain your text.
8) Paging and filtering
If the list contains more records than can be shown on one page, use the paging arrows at the bottom of the list to move forward and backward through the pages. Select a letter to show only those records whose names start with that letter.
This feature does not apply to all views.
9) Command bar
Use the commands in the command bar to operate on records in the list and perform related actions. Some commands (such as Delete) require that you first select one or more target records by placing a check mark in the leftmost column, while others operate on the entire list. You can export the list to an Excel workbook (possibly based on a template), open charts and dashboards, and more, depending on the type of records you are working with.
Important commands (buttons)
List of buttons that you will use on a daily basis:
New

After clicking on the New button, a form will open for you to create a new record of the given type. If we are in the Organizations group, a new account will be created.
Delete

To delete a record, it needs to have at least one selected. In some cases, the delete button is removed to prevent the record from being deleted. It is better to deactivate the record.
Edit

The button for editing will appear only after we select at least one record.
Activate/Deactivate
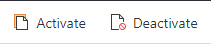
If you want to activate / deactivate a record, select the record and click on the button. It is better to deactivate records than to delete them.