Use accounts to manage customer companies
# Use accounts to manage customer companies
Accounts are the organizations you work with within the application. They can also be partner companies or suppliers. If you use accounts, you'll usually also set up at least one contact for each of them, these contacts usually represent employees at the company.
# List of all accounts
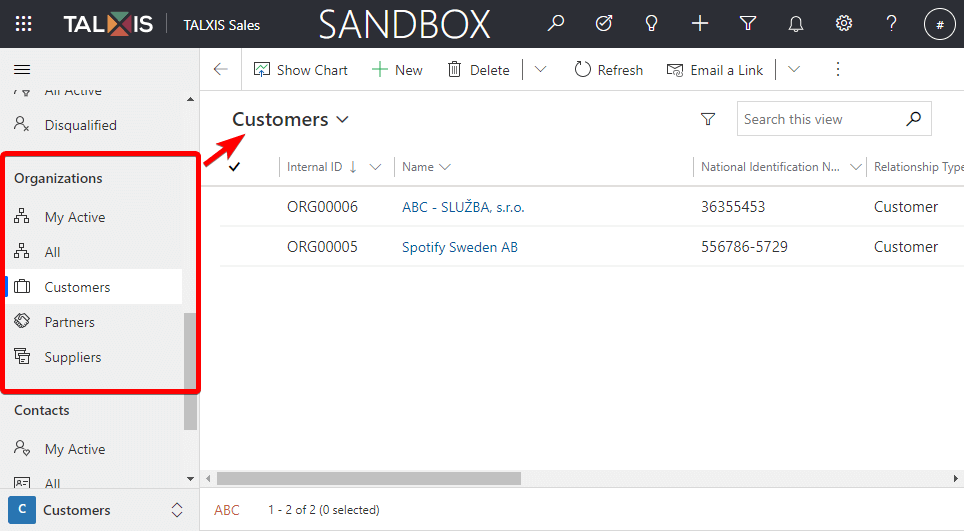
You can view all created accounts in the application. To view them, just go to the Organizations group and you will see a view with accounts. In addition, the Organizations group is divided into customers, partners, suppliers for a better overview. If you don't know what views are, take a look at this page: View records.
# Create a new account
A new account will be created using the form. If you don't know what forms are, check out this page: Forms.
Let's create a new account:
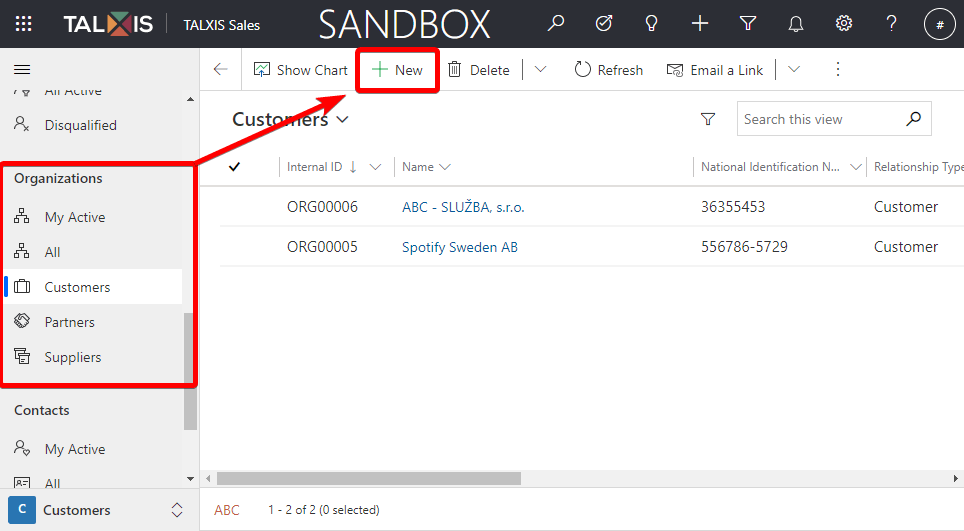
- Go to Accounts and select New in the command bar.
- The Account form opens.
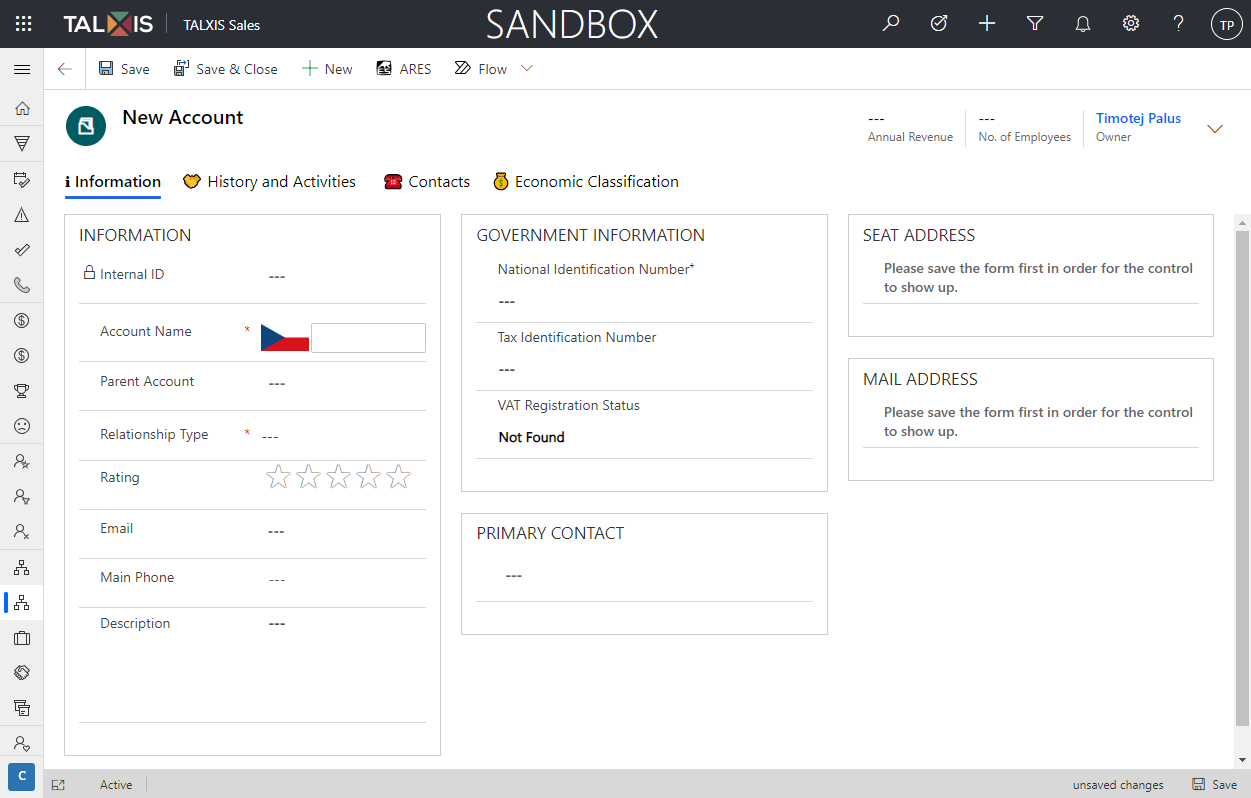
- Fill in the form.
There are many fields in the form that can be filled out. Not all fields and tabs are available immediately after opening the form, but only after saving the form.
The form header contains the owner of the account, annual revenue and the number of employees within the account.
The fields described in the tables below are divided by section.
Account information
| Field | Description | Example |
|---|---|---|
| Internal ID | Automatically generated id after saving the account. | ORG00001 |
| Account Name | The account name can be found by selecting the country and entering the name. This field is required. How to select account name | |
| Parent Account | Parent account associated with account. You can select an existing company with lookup control or create a new one via forms or quickcreate form. | |
| Relationship Type | Type of relationship with the organization. This field is required and you must select at least one relationship type. | Customer/Partner/Supplier/Prospect/Indirect Cutomer/Other |
| Rating | Subjective rating of the account. More green stars means a higher rating. |  |
| Account(company) email. | hello@networg.com | |
| Main Phone | Company phone number. | |
| Description | Brief description of the company. | A company with good manners and the ability to repay. |
Government information
| Field | Description | Example |
|---|---|---|
| National Identification Number | National identification number of account. This field is filled in automatically when account name is selected. | 34114050 |
| Tax Identification Number | A Tax Identification Number (TIN) is a nine-digit number used as a tracking number. | |
| VAT Registration Status | VAT Registration Status tells us whether the account is a reliable payer or an unreliable payer. | Reliable payer/Unreliable payer/Not found |
Selecting the country and entering the name
- Save the form using the Save button.
# Select account name
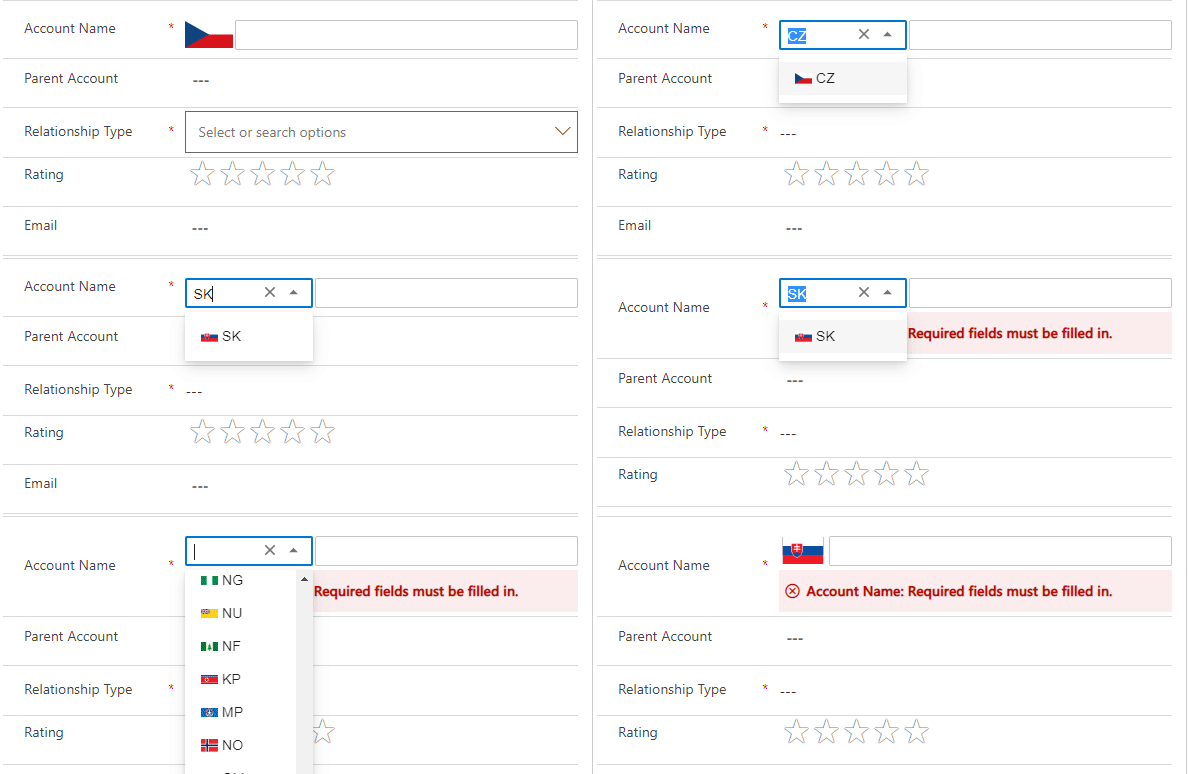
When you select an account, you set the country in which the account is located and the account name.
Select country
When selecting a country, you can enter a country abbreviation or select from a list of countries.
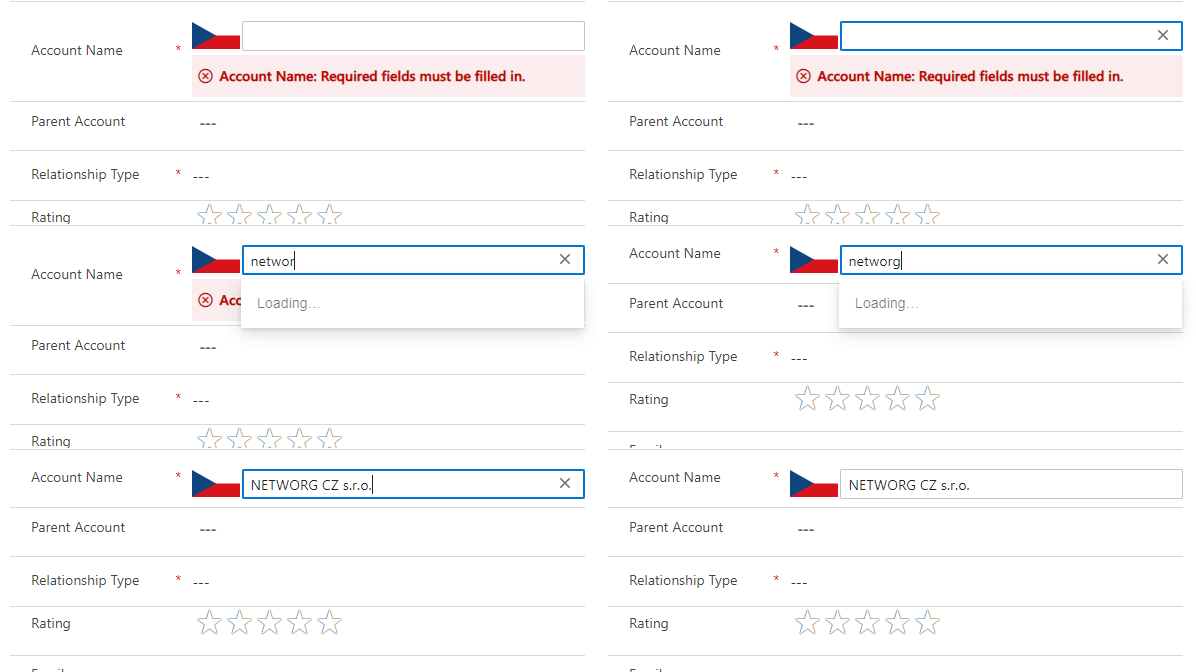
Select account
To select an account, just type in the name and you'll see the search results.
# Select primary contact
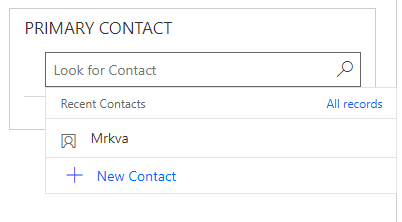
On the form in the PRIMARY CONTACT section, set the main contact with whom you most often communicate within the company.
You can select an existing contact with lookup control or create a new one via forms or quickcreate form.
# Set seat and mail address
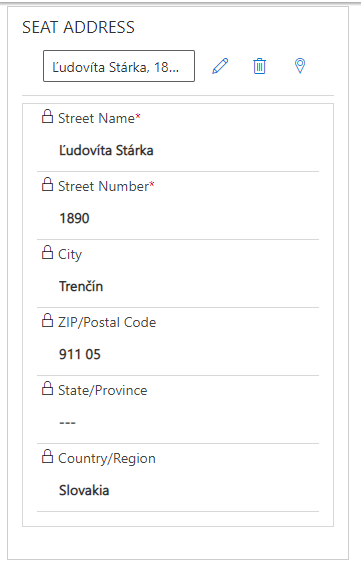
Seat and mail address is automatically filled in after selecting the account name. Addresses can be edited or added as shown on this page.
# History and activities
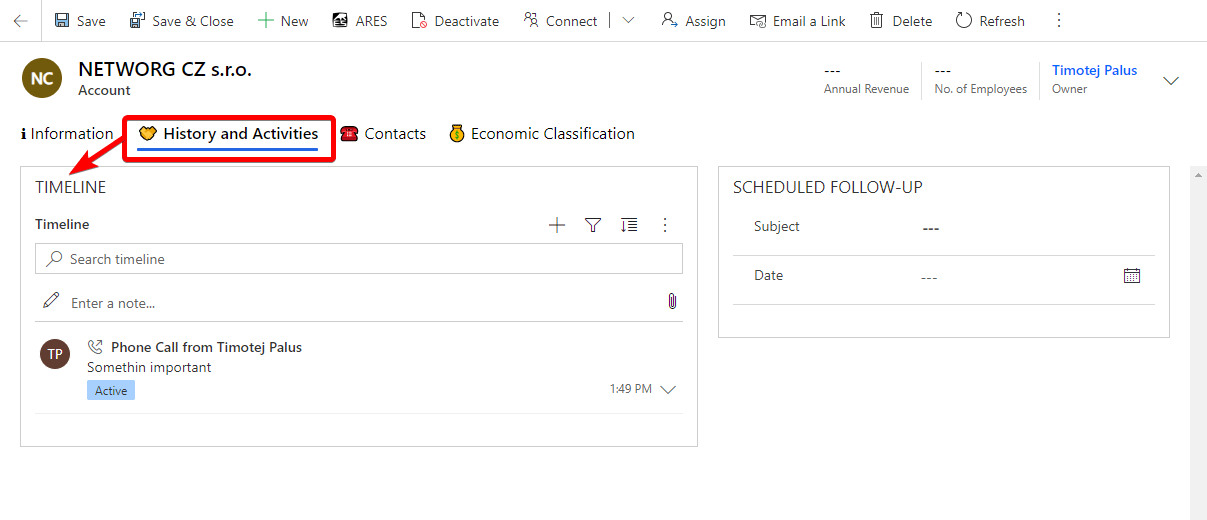
In the History and Activities tab you will find the timeline. The timeline is used to store activities linked to a record. This functionality is available only after saving a new account. More information here.
# Contacts associated with account
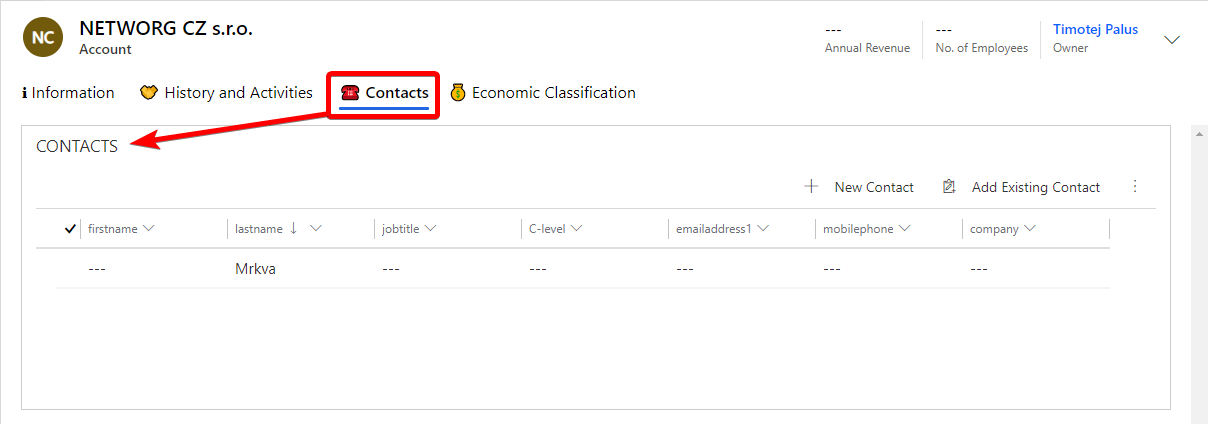
In the Contact tab you can find all contacts that are assigned to the account. You can add new or delete old contacts. In the Contact tab you can find all contacts that are assigned to the account. You can add new or delete old contacts. This functionality is available only after saving a new account. If you don't know how to use the buttons at subgrid, see Subgrid.
# Economic classification
Economic classification classifies companies, organizations and traders into industrial groupings based on similar production processes, similar products, or similar behavior in financial markets.
You can select from existing economic classifications or create a new economic classification.
Create a new economic classification
- In the subgrid, press Add Existing Classification.
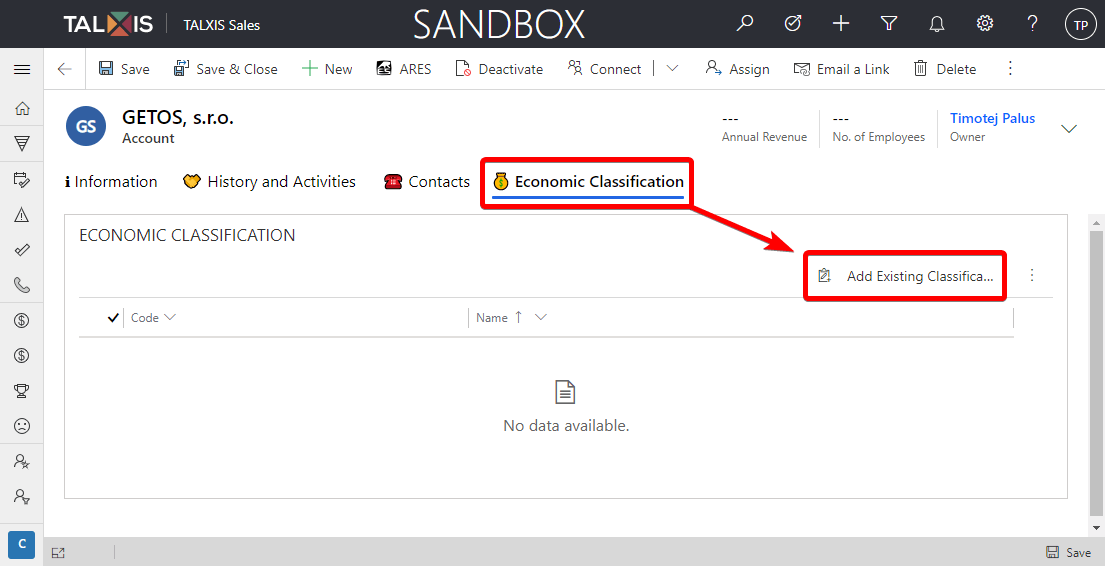
In the quick create form, select the New record and then select the Classification of Economic Activities type.
You will be notified that you are leaving the form. Press OK and then enter the name of the classification in the form.
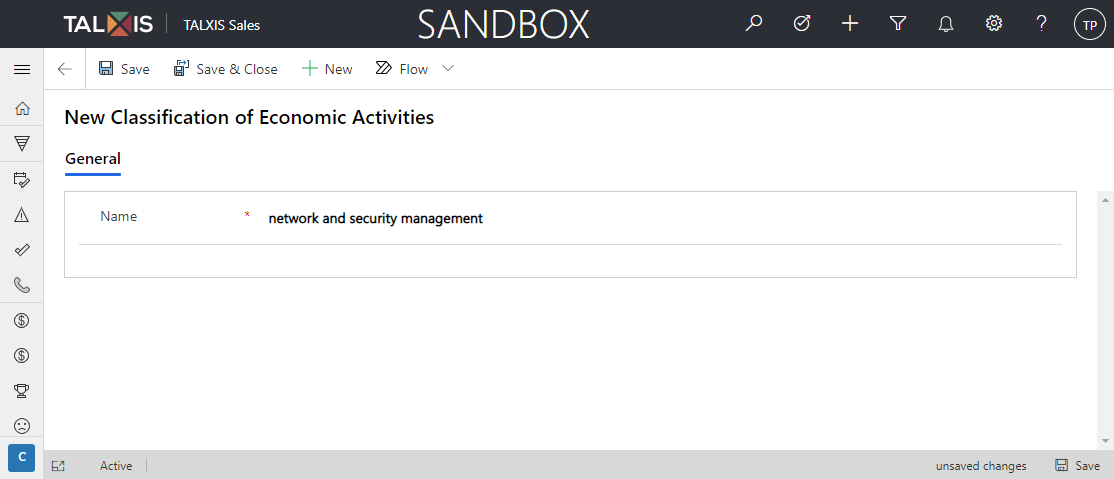
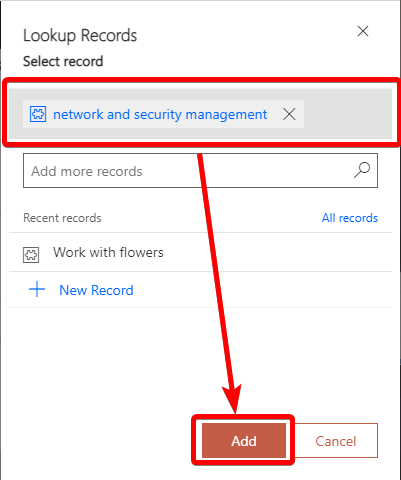
Press Save & Close in command bar. You will be redirected back to the account form and now when you press the Add Existing Classification button, you will see the classifications you have created in the list.
Select a classification and add it to the account.
# Deactivate account
You deactivate an account or contact rather than deleting it. This ensures the integrity of the audit trail associated with that record.
When a deactivated contact becomes inactive, it cannot be edited. However, it can still be used to establish new relationships with other records. All relationships created with the deactivated item are still available.
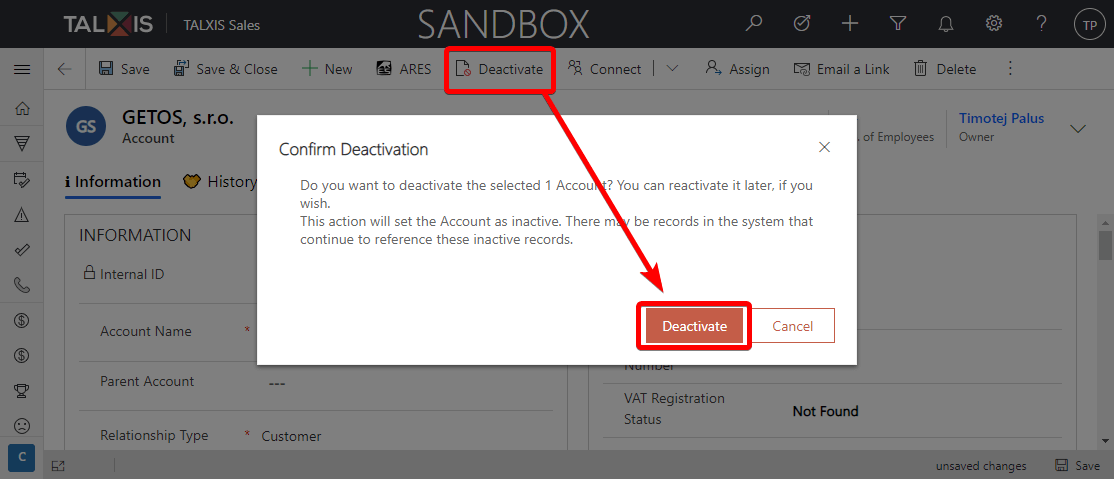
- To deactivate an account, press the Deactivate button and confirm it in the dialog.
